By following these steps, you should be able to successfully download, install, and activate WireGuard on your Windows PC using the provided configuration file or QR code.
Wireguard VPN Client Setup from Provided Config File on Windows 11
With the increasing concern over online privacy and security, virtual private networks (VPNs) have become a popular choice for individuals and businesses alike. Among the many options available, WireGuard has gained significant attention for its simplicity, efficiency, and security. In this article, we will guide you through the process of setting up a WireGuard VPN client on a Windows 11 system using a provided configuration file.
Before diving into the setup process, let's briefly explore what WireGuard is and why it has gained such popularity. WireGuard is a modern VPN protocol that aims to provide a faster and more secure VPN solution compared to traditional protocols like OpenVPN or IPSec. It boasts faster connection times, improved performance, and better encryption algorithms, all while maintaining simplicity and ease of use.
Prerequisites:
To set up the WireGuard VPN client on your Windows 11 system, you'll need a configuration file provided by your VPN service provider or IT Department (WRLD). This file contains all the necessary information to establish a connection to their VPN servers. Once you have obtained the configuration file, follow the steps below:
Important Note - DO NOT SHARE YOUR CONFIG FILE
Your config file has very important security info for your connection and if compromised, it could open a whole can of worms. To access via your mobile device, you can use the same config file but only on 1 device at a time, to have multiple - please request an additional config file from your IT Team.
Step 1: Download and Install the WireGuard Client for Windows 11
The first step is to download and install the WireGuard client for Windows 11. You can find the latest version of the WireGuard client from the official website or other trusted sources. Once downloaded, run the installer and follow the on-screen instructions to complete the installation.
Step 2: Import the Configuration File
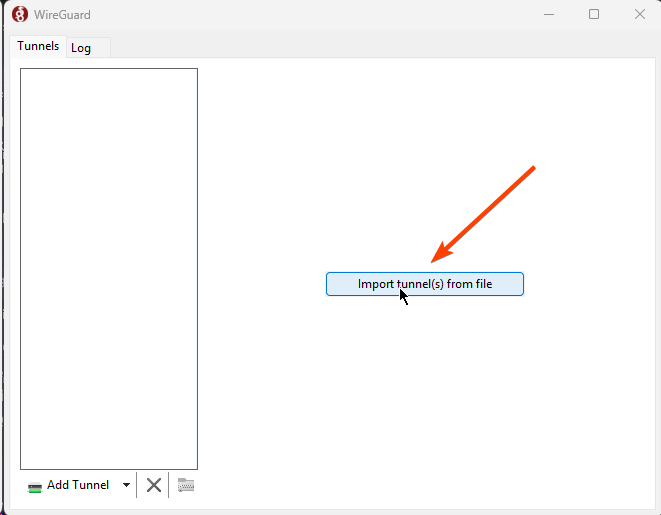
Run WireGuard and you will see the following screen:
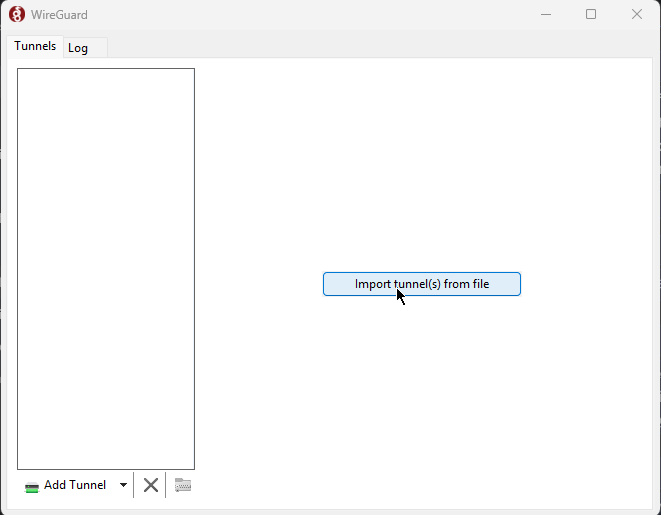
After installing the WireGuard client, locate the configuration file provided by your IT team or by contacting [email protected]. Typically, the file will have a ".conf" extension. Right-click on the WireGuard icon in the system tray and select "Import tunnel(s) from file." Browse to the location of the configuration file and select it. The client will import the configuration and display it in the WireGuard interface.
Ask IT / WRLD Team for config file - do not share config file
You cannot use the same config file for multiple devices at the same time, you will need each device to have separate config files
Do not share this file or use for multiple persons as it will fail.
Step 3: Connect to the VPN Server
With the configuration file imported, you are now ready to connect to the VPN server. In the WireGuard interface, you will see the imported tunnel listed. Click on the toggle switch next to the tunnel to establish a connection. Once connected, the switch will turn green, indicating a successful connection.
Step 4: Verify the Connection:
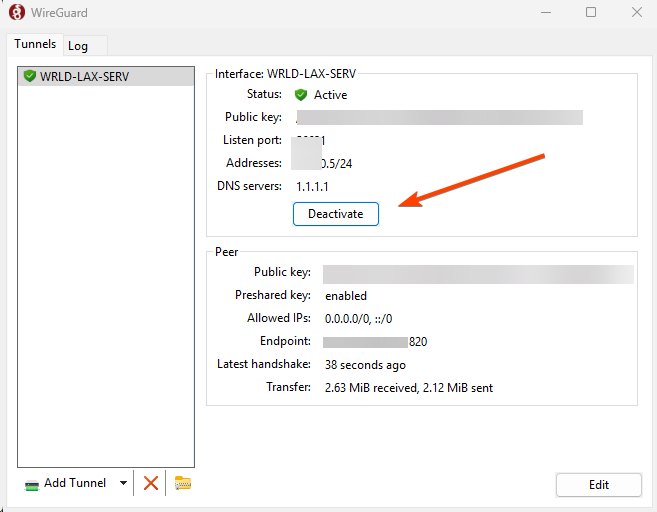
Don't just trust the green shield! Verify your IP is updated as well!
- Once the tunnel is active, verify the connection by checking your IP address or accessing resources that require the VPN.
- Once the tunnel is active, verify the connection by checking your IP address or accessing resources that require the VPN.
- Before connecting, go to whatismyip.com and check your IP Address
- After connecting to the tunnel, go to whatismyip.com and it should be updated to a new IP and/or location. You can also google "what is my ip" as well